Setting up your company in eHubt is the first step toward activating your account and gaining full access to the platform. Follow the step-by-step instructions below to complete the initial setup process.
👉 Watch the full tutorial here
Company Setup
This video will walk you through the full process visually.
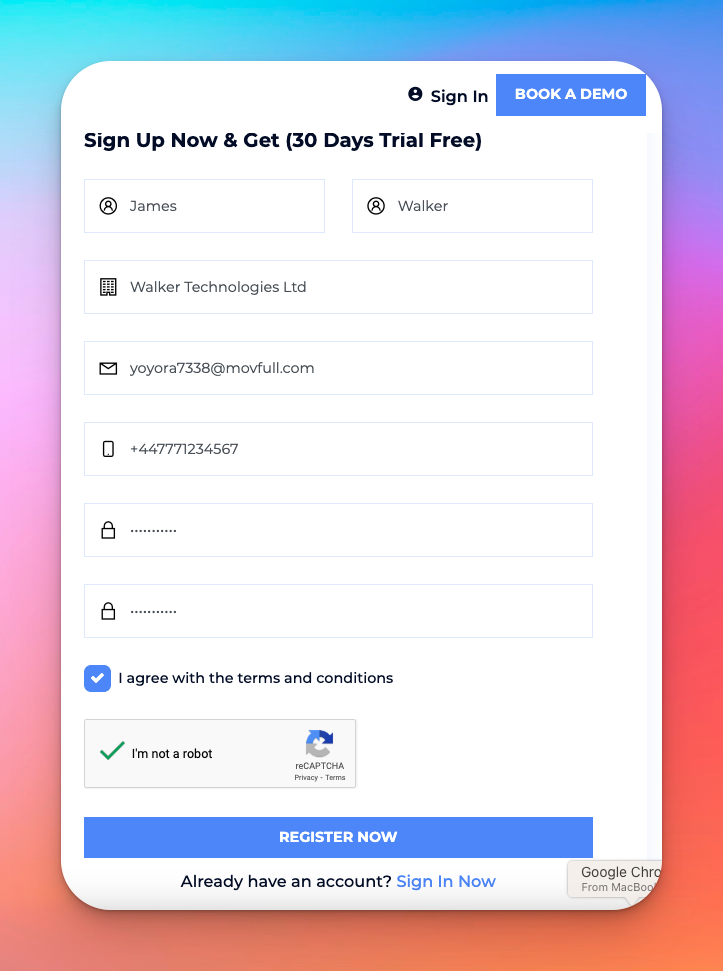
Fill out your first and last name.
Enter your company name, email, phone number, and choose a password.
Agree to the terms and conditions, complete the CAPTCHA, and click Register Now.
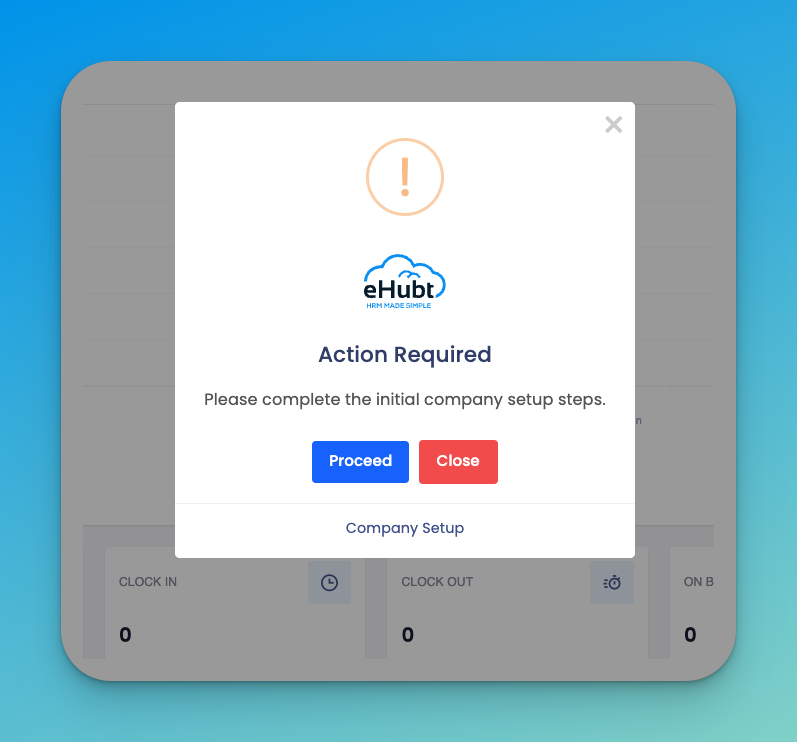
After logging in, you’ll see a popup:
“Please complete the initial company setup steps.”
Click Proceed to begin.
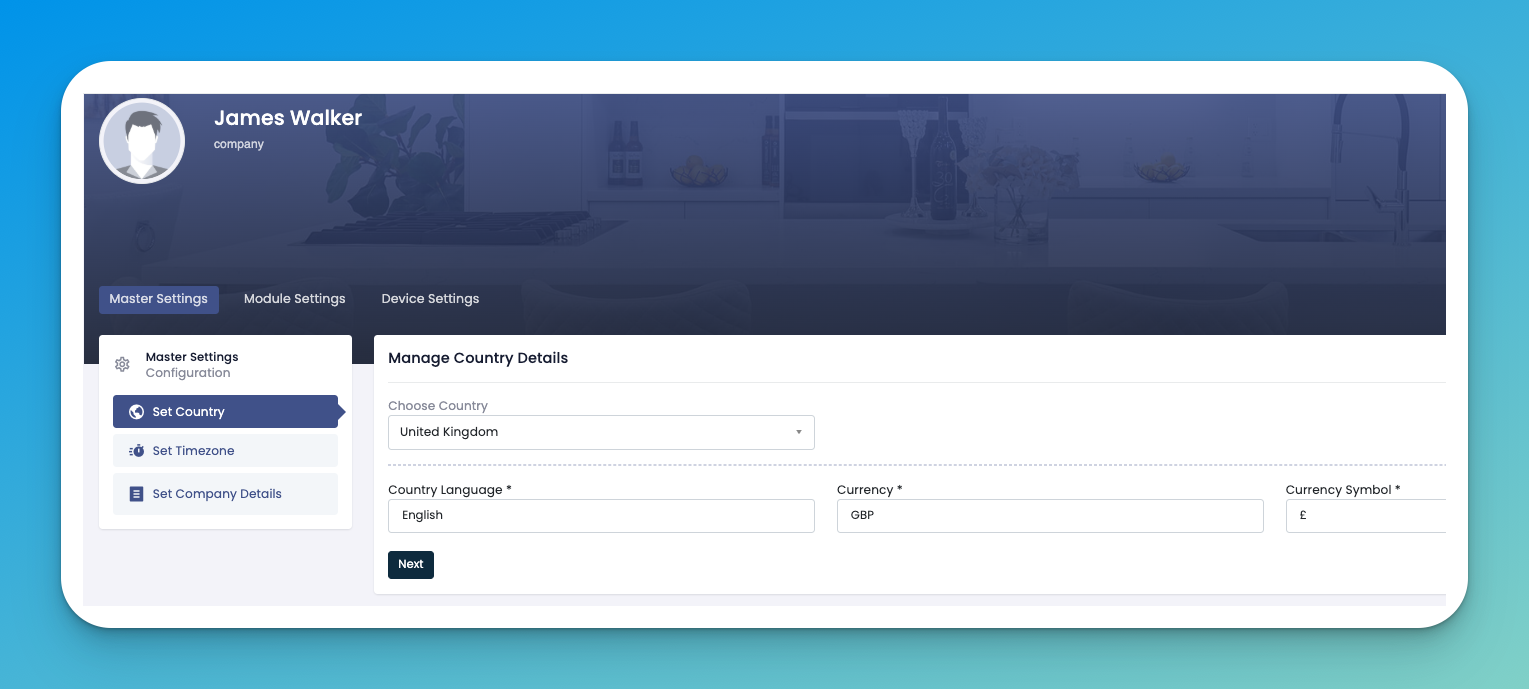
Choose your company’s:
Country
Language
Currency and symbol
Click Next to continue.
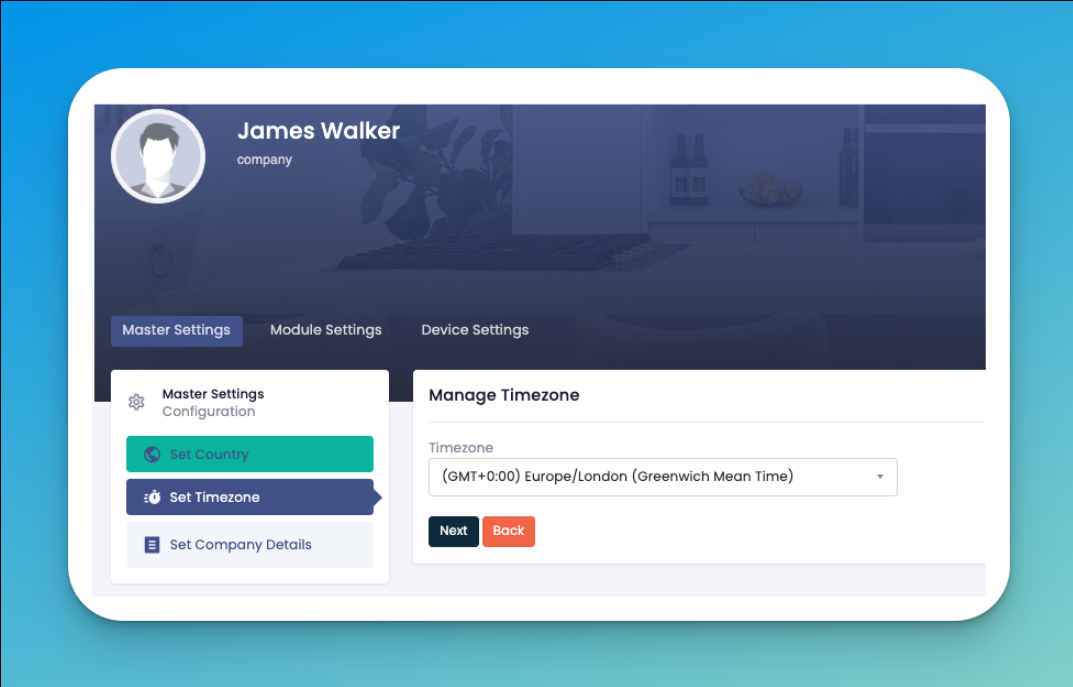
Select the appropriate time zone for your company’s location
Click Next to continue.
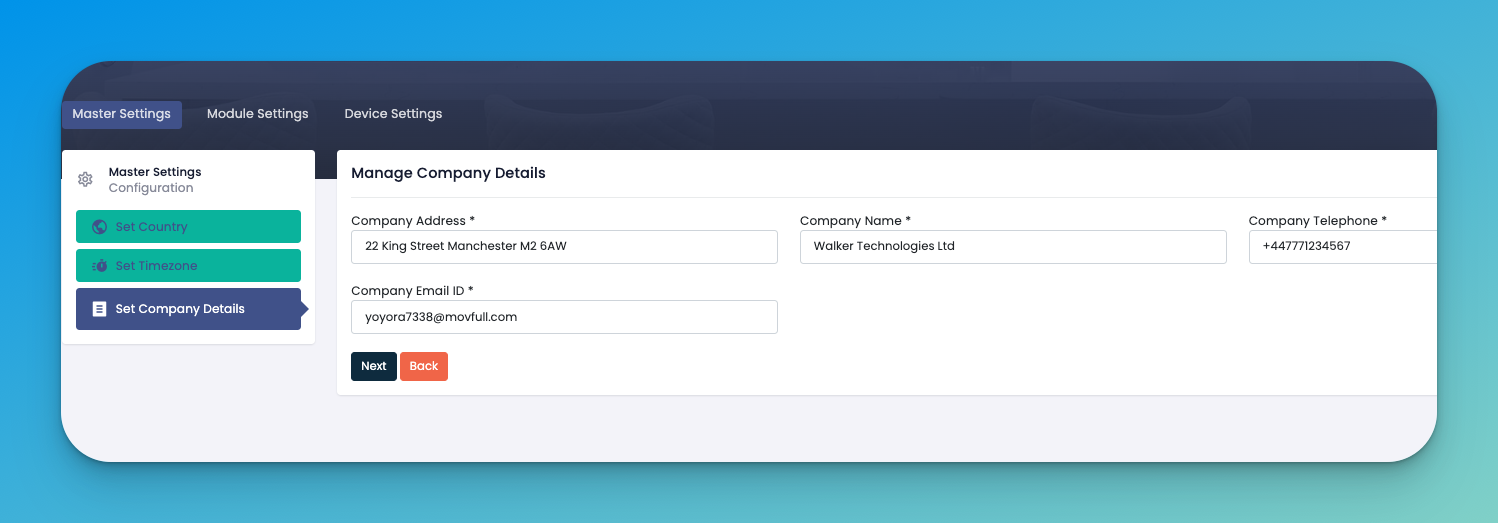
Provide:
Company Address
Company Name
Company Email
Company Telephone
Click Next.
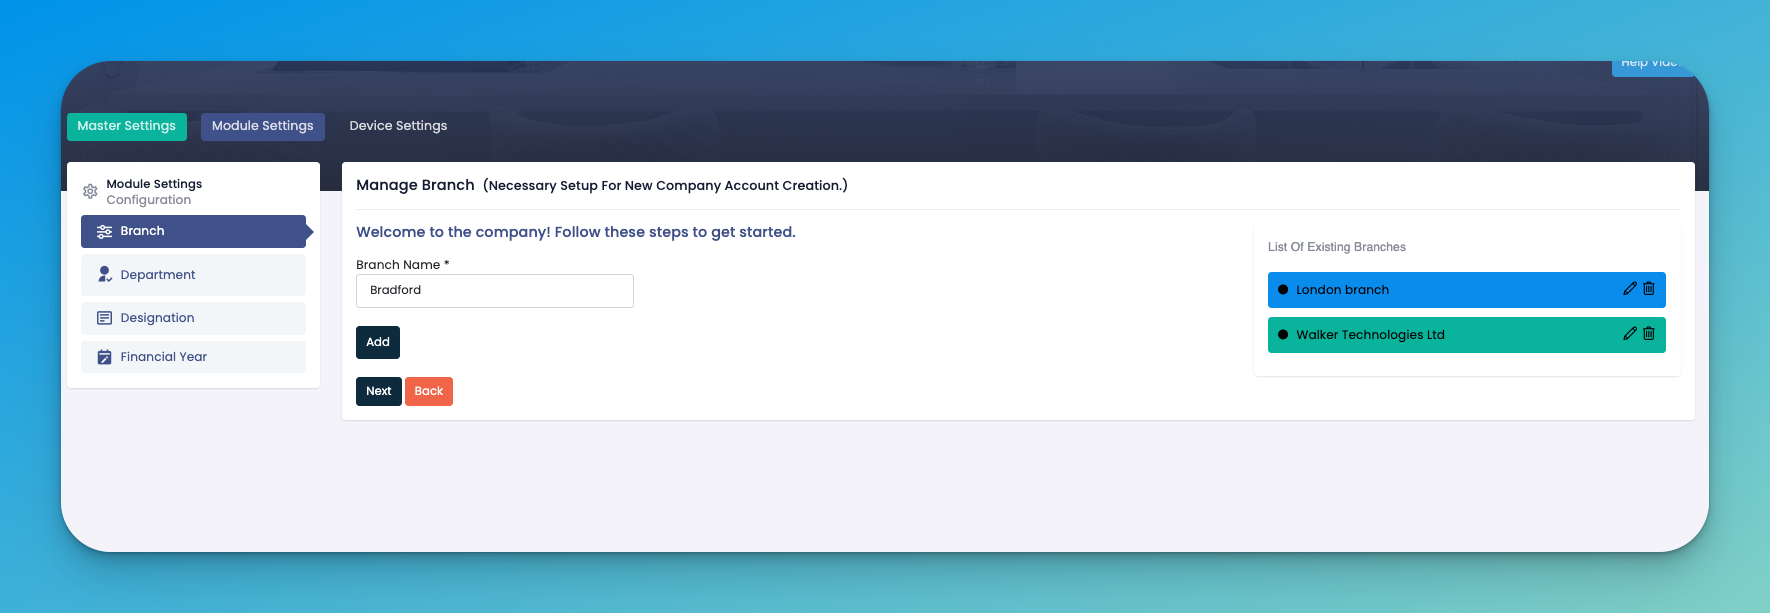
Add your company’s branches. For example:
London Branch
Bradford
Walker Technologies Ltd
Click Add after entering each, then Next.
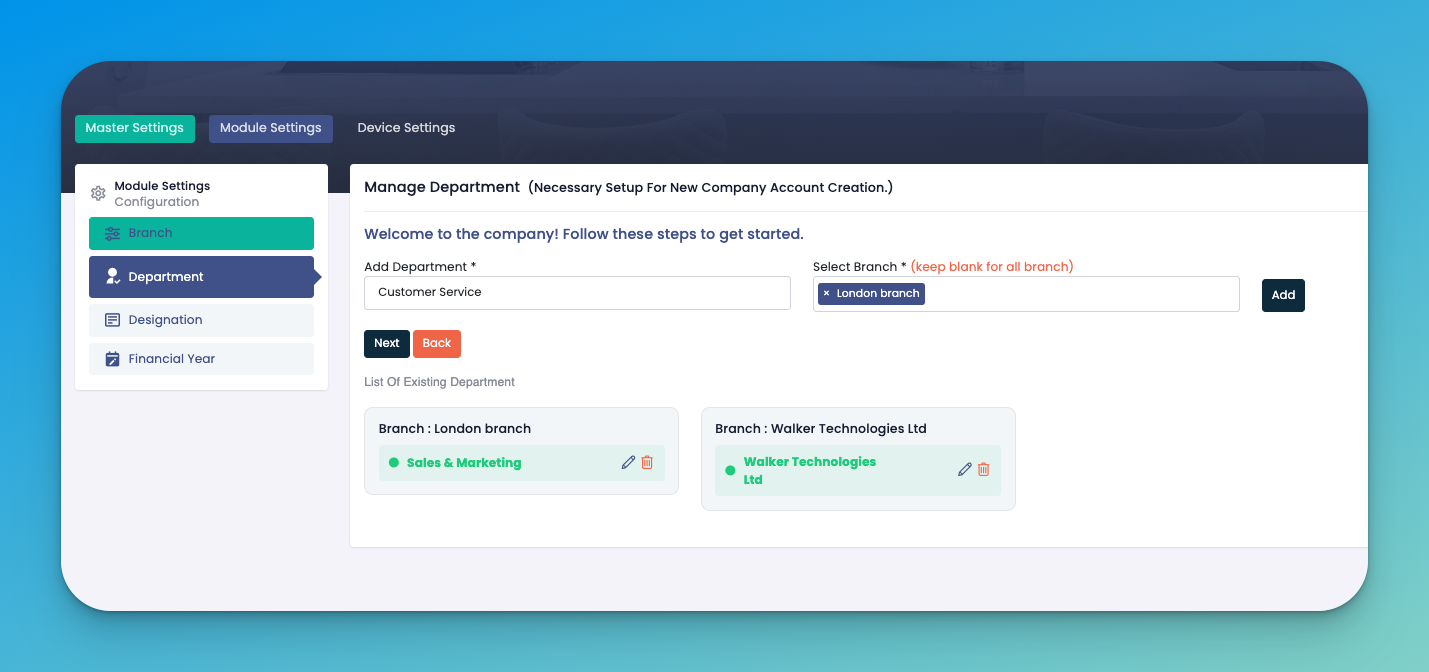
Enter department names and associate them with specific branches (or leave branch blank to apply to all).
Examples:
Customer Service
Sales & Marketing
Click Add after entering each, then Next.
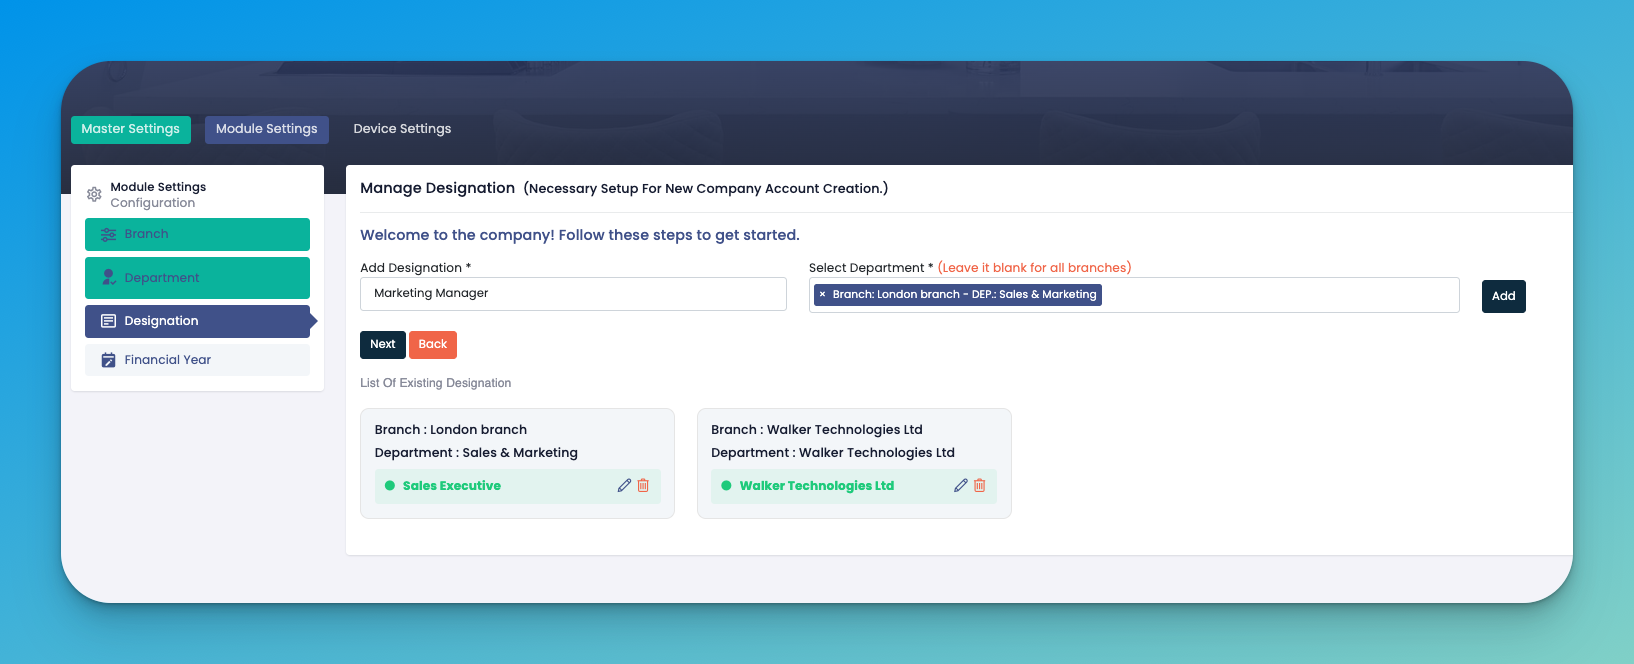
Input designations for each department.
Examples:
Marketing Manager
Sales Executive
Click Add after entering each, then Next.
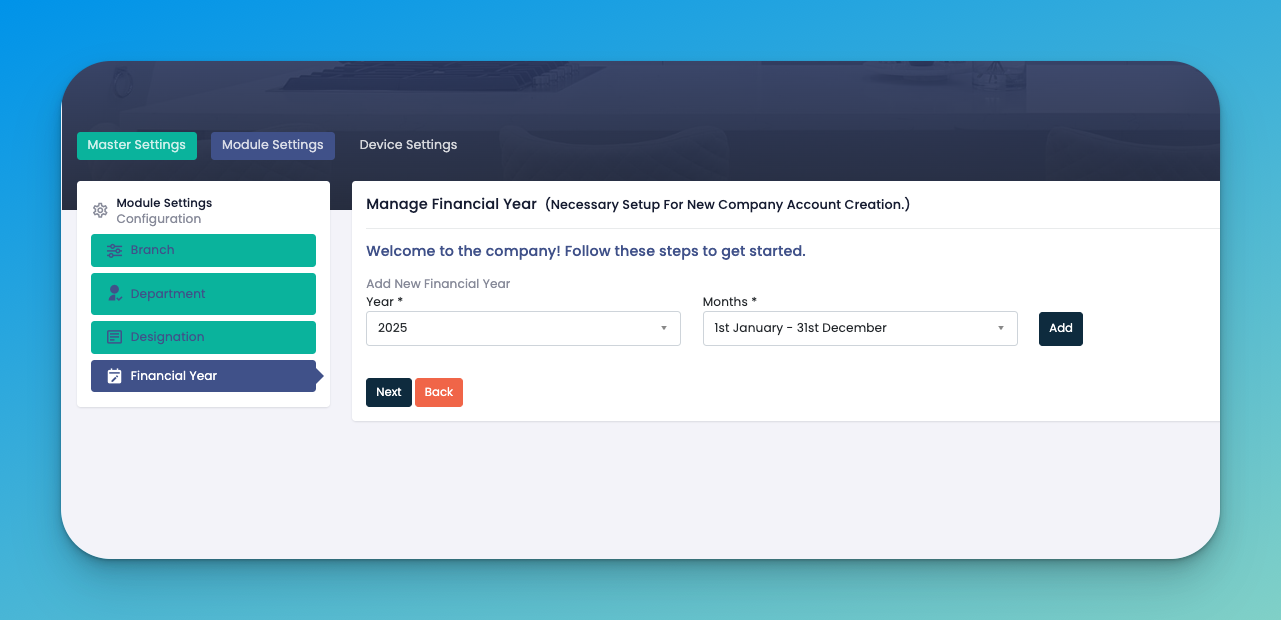
Choose the current financial year and the duration (e.g., “1st January - 31st December”).
Click Add after entering each, then Next.
✅ Tips
Complete setup in one go – It only takes a few minutes, and completing all steps upfront avoids system interruptions later.
Use accurate company details – Make sure the company name, address, and contact info match legal documents and business records.
Set the correct timezone and currency – This ensures your rota, payroll, and reports align with your business location and financial standards.
Add all existing branches and departments – Even if not active yet, setting them up now will make staff assignment and rota planning easier later.
Assign relevant designations – Clear job titles help with employee role assignment, permissions, and payroll configurations.
Create tablet credentials carefully – Tablets will be used for staff clock-ins, so keep usernames/passwords secure and branch-specific.
Test attendance tablet login – After setup, verify that tablets can log in and register attendance correctly.
Review before clicking ‘Finish’ – Once completed, you’ll move to employee creation, so double-check for any missing steps.
Need help? – Click the Help Video button on the top right at any time during the setup process.
Q: Why am I being asked to complete a company setup after signing up?
To ensure your account is tailored to your country, timezone, branches, and structure. This is a one-time setup that unlocks all eHubt features.
Q: What happens if I skip the setup?
You won’t be able to access core modules (like employee creation, attendance, etc.) until setup is complete. Click “Proceed” on the popup to continue.
Q: Can I add more branches or departments later?
Yes! You can add, edit, or delete branches, departments, and designations anytime from your Company Settings.
Q: What if I have multiple offices?
You can create multiple branches (e.g., London, Bradford), and assign employees accordingly. This ensures accurate tracking and payroll.
Q: What is a designation?
A designation is the job title (like Manager, Chef, Cleaner). You can link these to departments for structured hierarchy.
Q: Is setting up the financial year mandatory?
Yes. The financial year is needed for payroll, reporting, and leave tracking. You can choose standard dates or customize it.
Q: Can I change company details later (like phone/email)?
Absolutely. You can go to Company Settings → Master Settings and update details anytime.