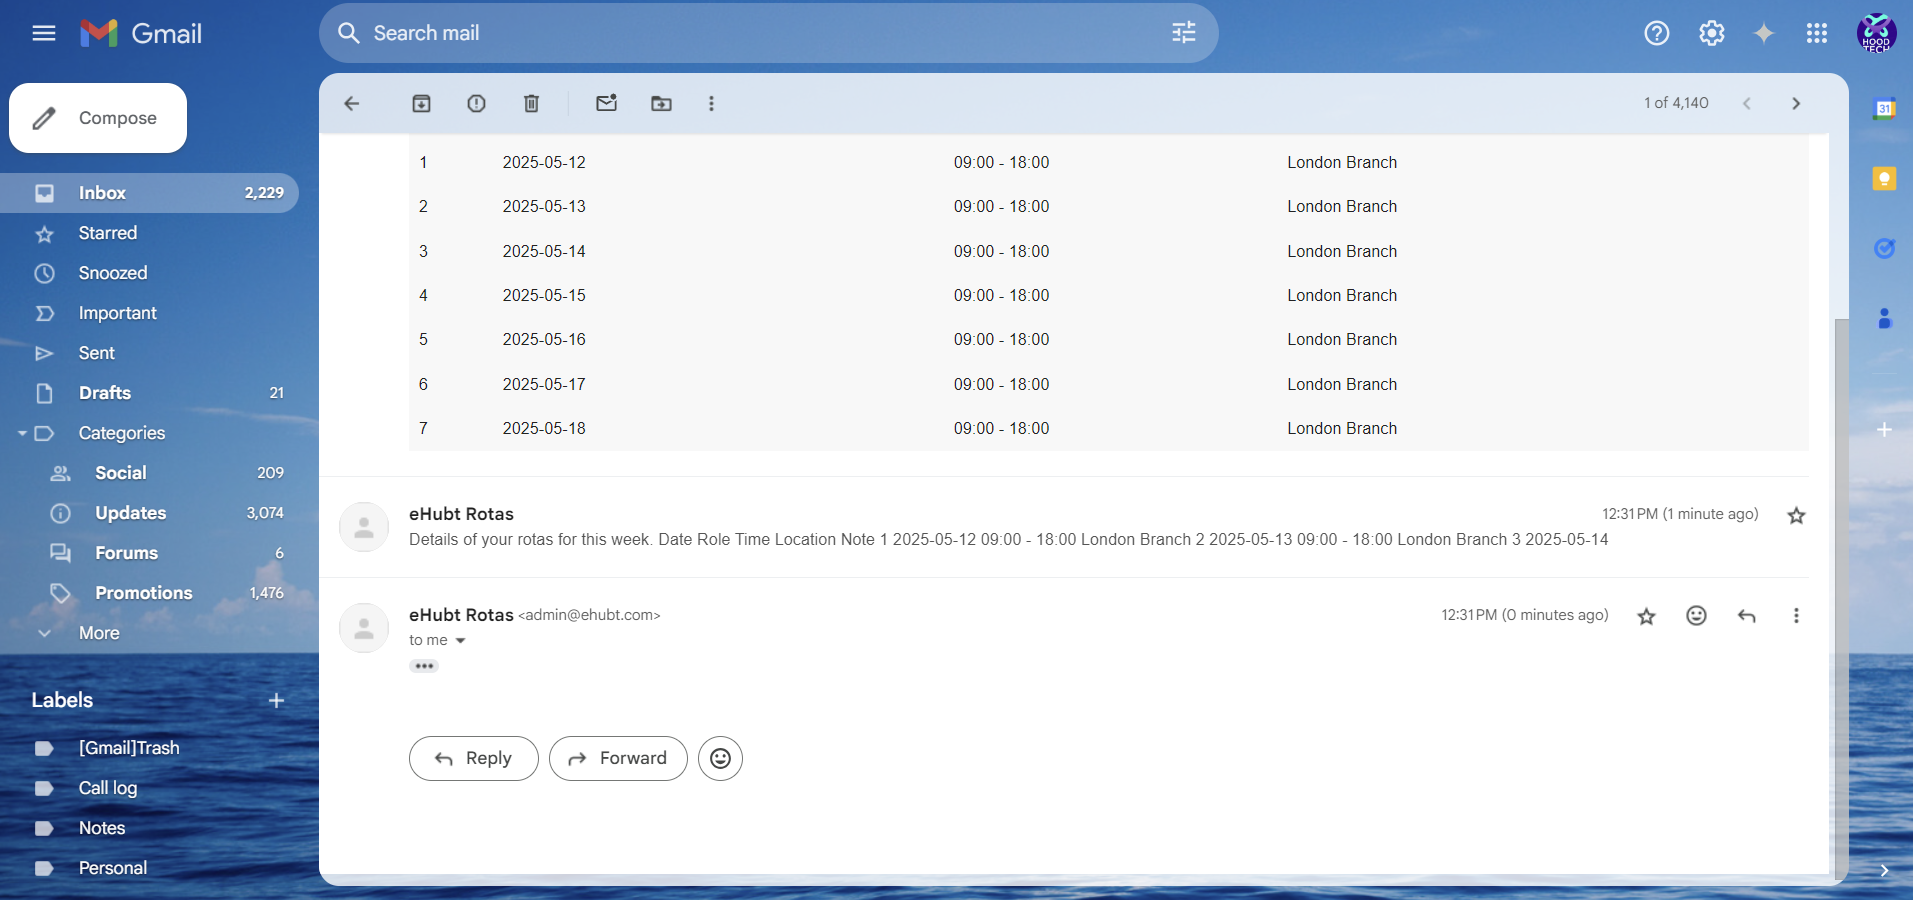
Click the ✔️ button at the top to publish (locks the schedule)
Optionally, click the ✉️ mail icon to email the published rota to everyone
Once sent, the rota will arrive in your team’s inbox with a clear summary of shifts
Once you register yourself, you will be able to see this screen
🆓 Free Rota Setup
🎉 Free for up to 20 employees—forever.
The Free Rota feature walks you through four simple steps—🏢 Location Setup, 👥 Employee Management, 🗓️ Rota Creation, and 📤 Publish & Notify—so you can have your team’s schedule live in minutes.
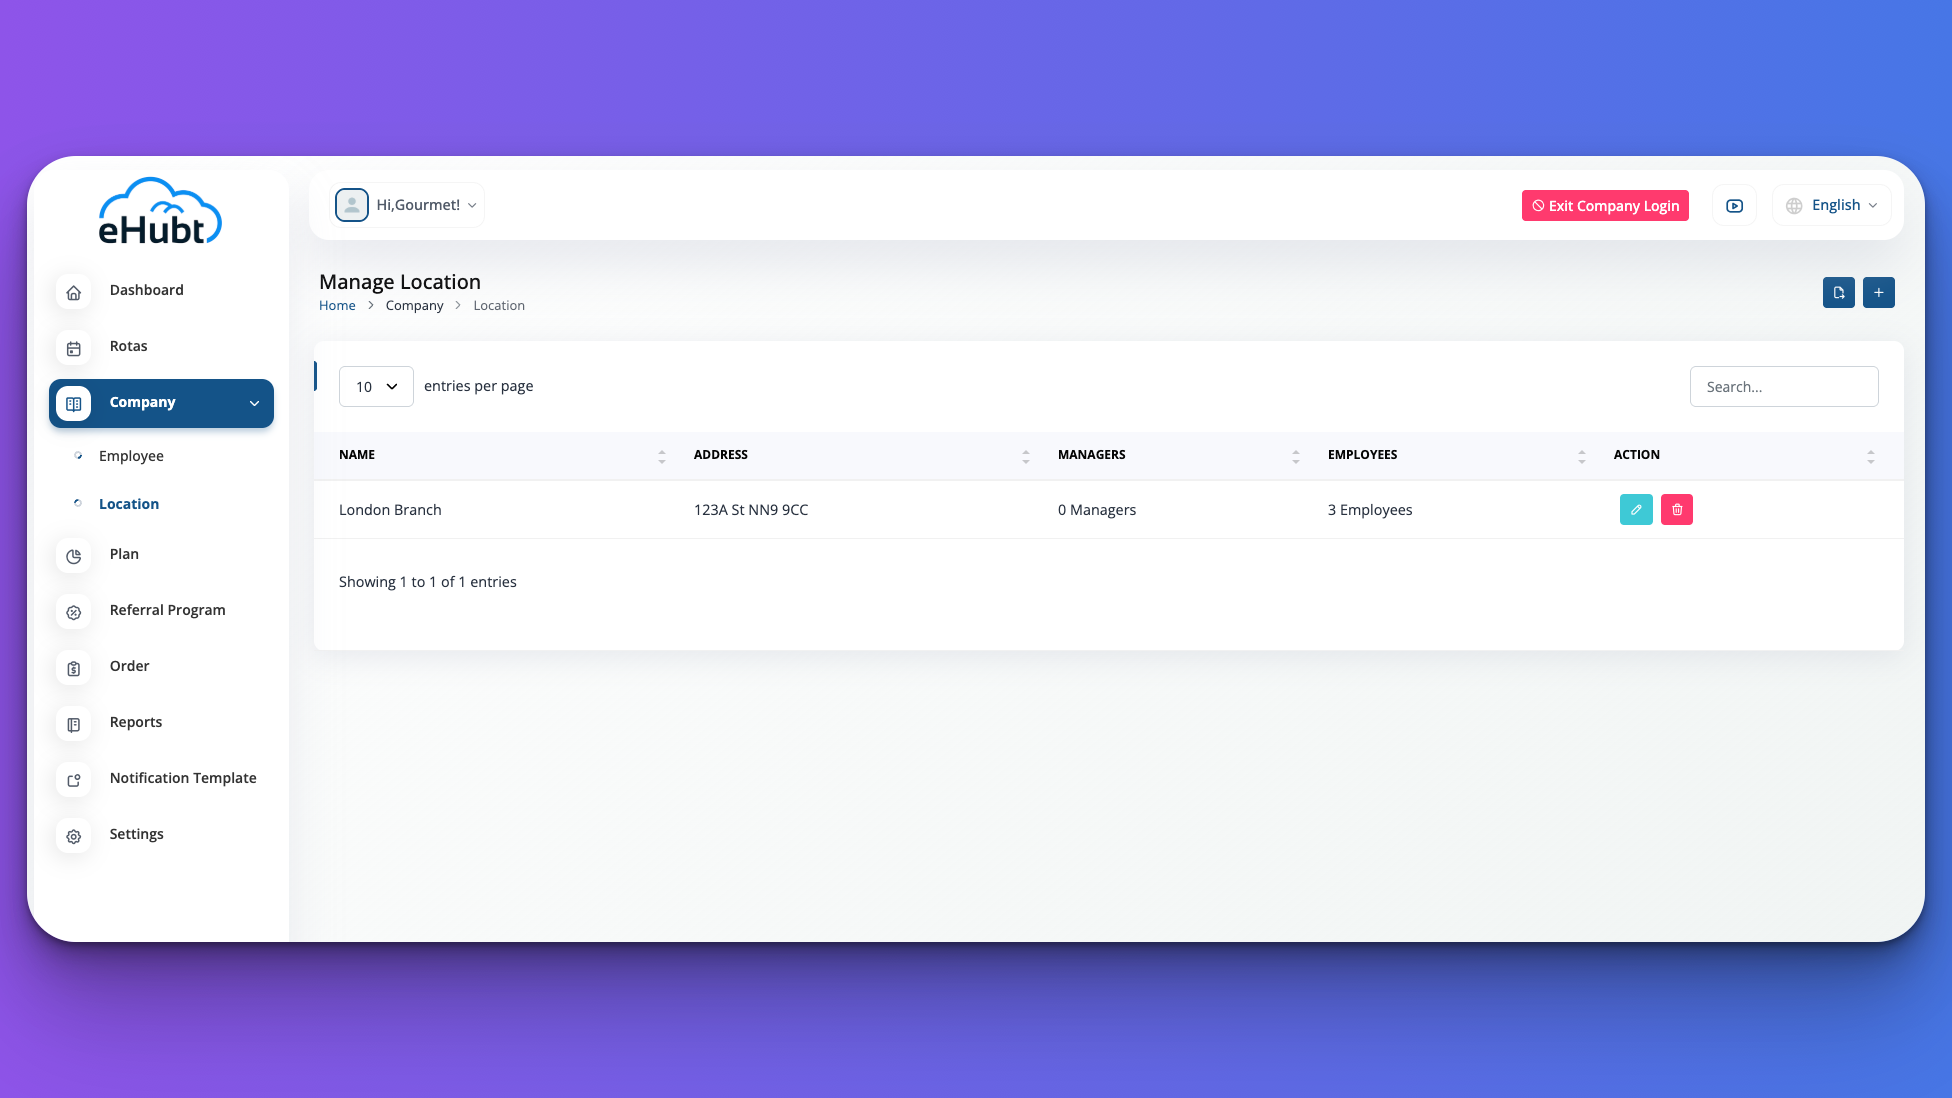
Before creating any rota, you need to define at least one business location.
To add a location:
Go to Company > Location in the left menu
Click the + button
Enter your branch Name and Address (or postcode)
Save to return to your location list
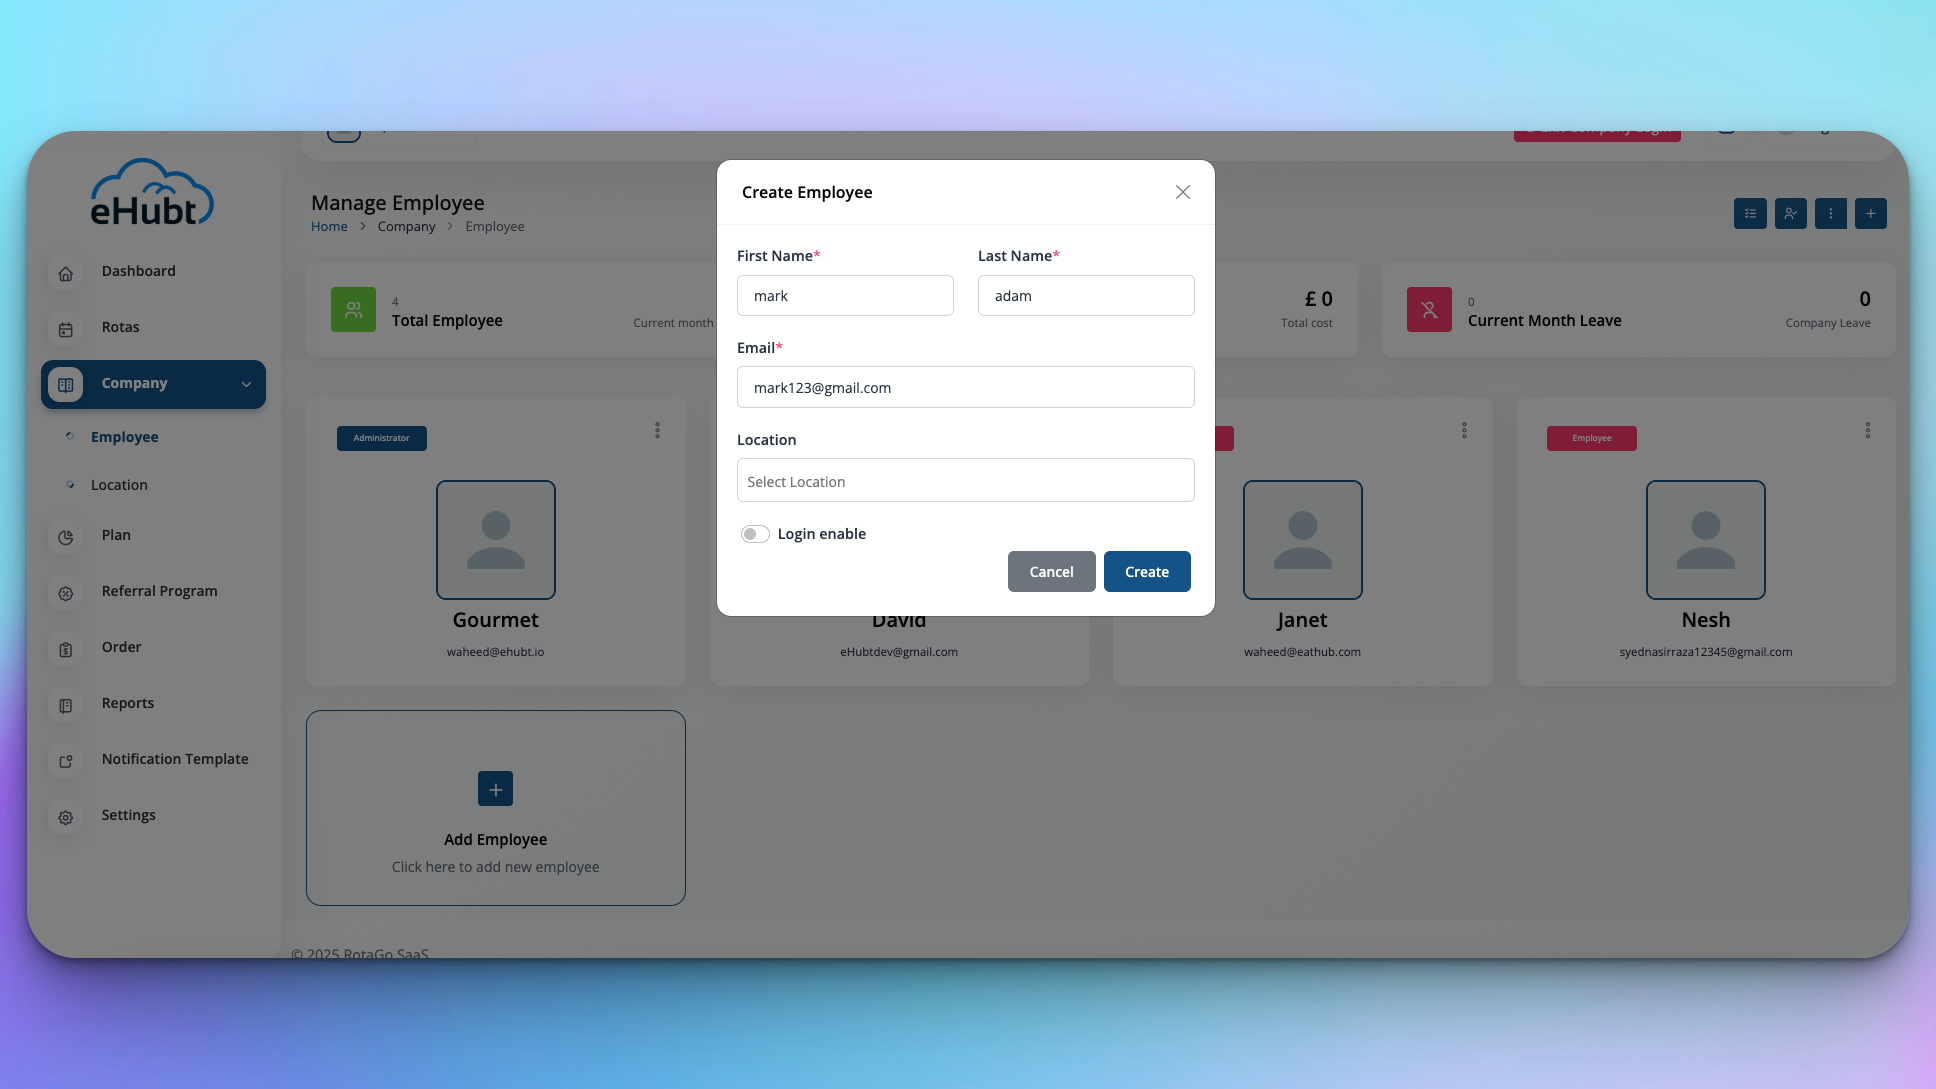
Register the staff who will appear on your rota.
To add an employee:
Navigate to Company > Employee
Click the + icon
Fill in Name, Email, Role, and other required fields
Save to include them on future rotas
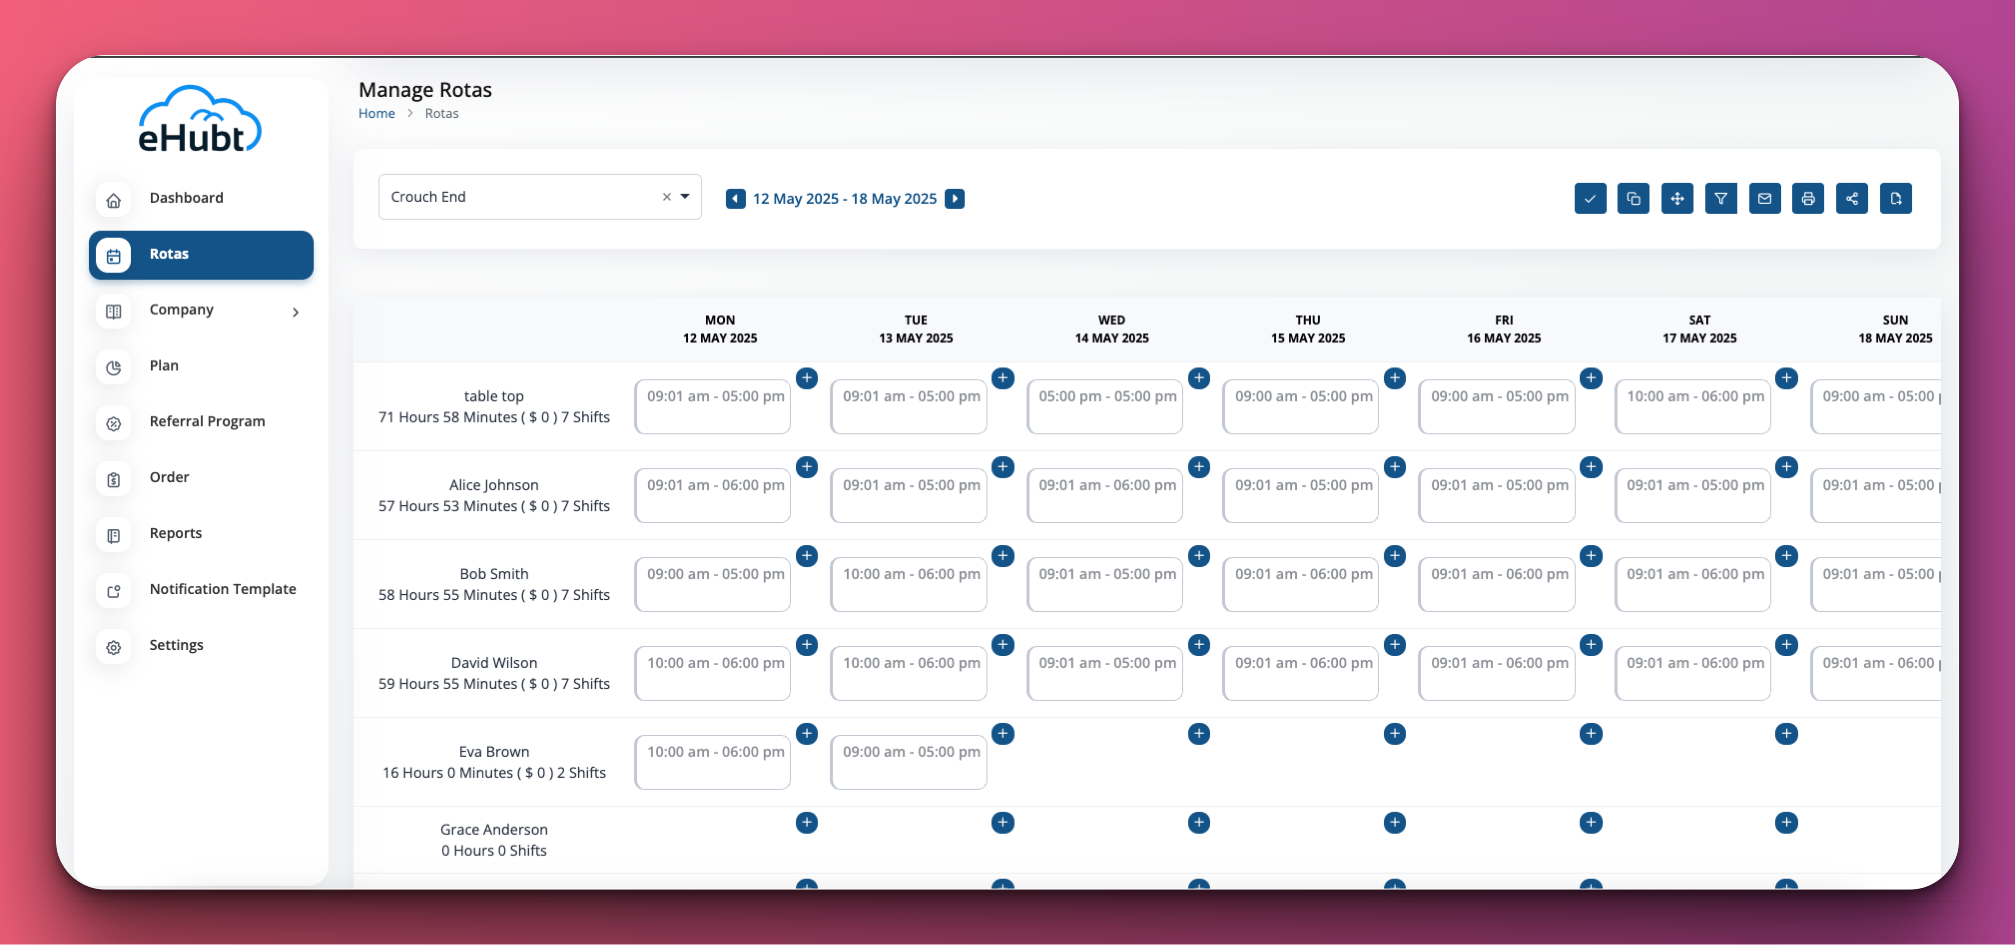
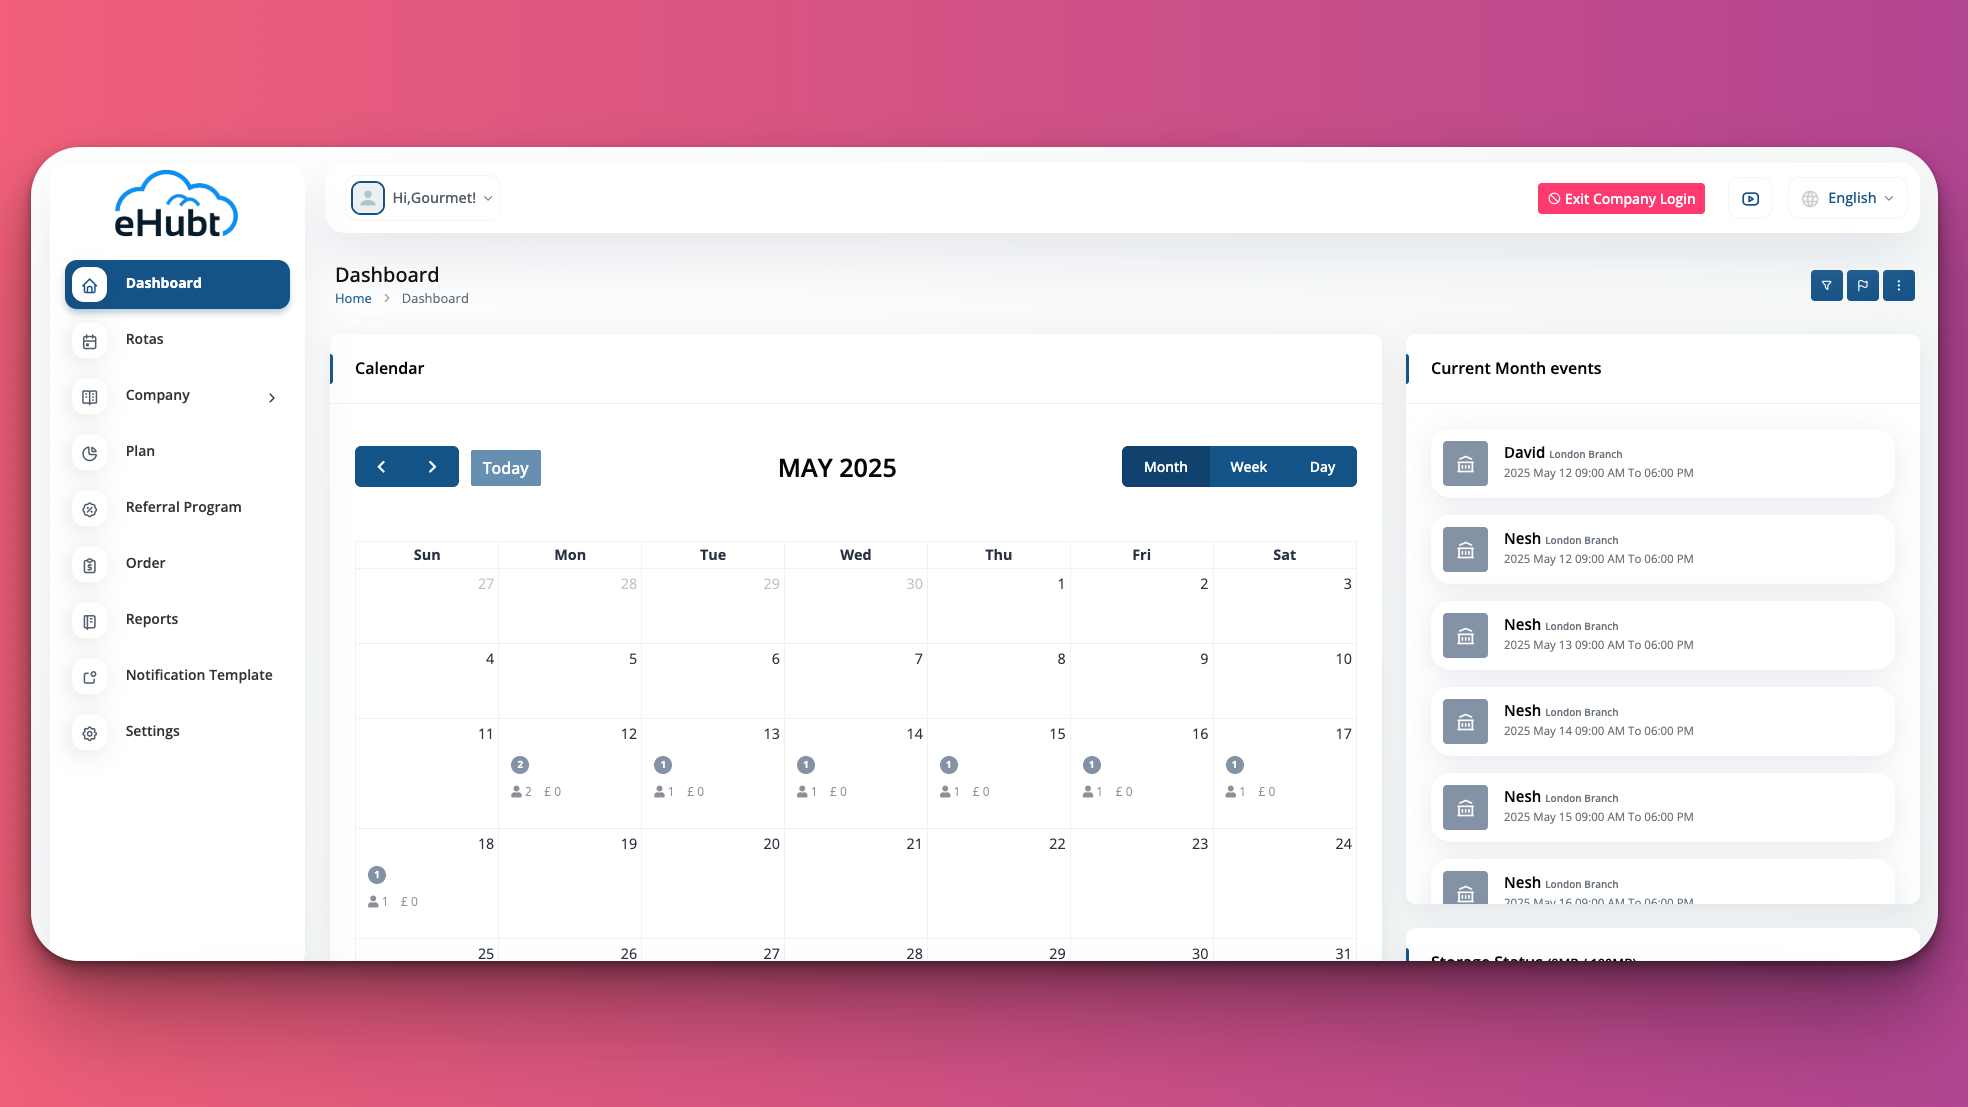
Build your weekly schedule by assigning shifts to each employee.
To create shifts:
Select Rotas in the left menu
Choose your Branch and the desired Week
Click the + in any day-cell for an employee row
Enter Start/End times (and any shift type) and save
Finalize and share your rota with staff.
To publish and notify:
Click the ✔️ button at the top to publish (locks the schedule)
Optionally, click the ✉️ mail icon to email the published rota to everyone
Once sent, the rota will arrive in your team’s inbox with a clear summary of shifts
❓ Common Questions
Is there any cost?
No—it’s free for up to 20 employees, for life.
Can I edit after publishing?
Yes. Click ✔️ to “unpublish,” make edits, then republish.
How do employees get their rota?
Use the ✉️ Email button to send the latest schedule.
Can I view other weeks?
Use the arrows beside the date range to navigate backward or forward.