👉 Watch the full tutorial here:[Attendance Tablet Video]
Company Settings → Attendance Tablet Setup
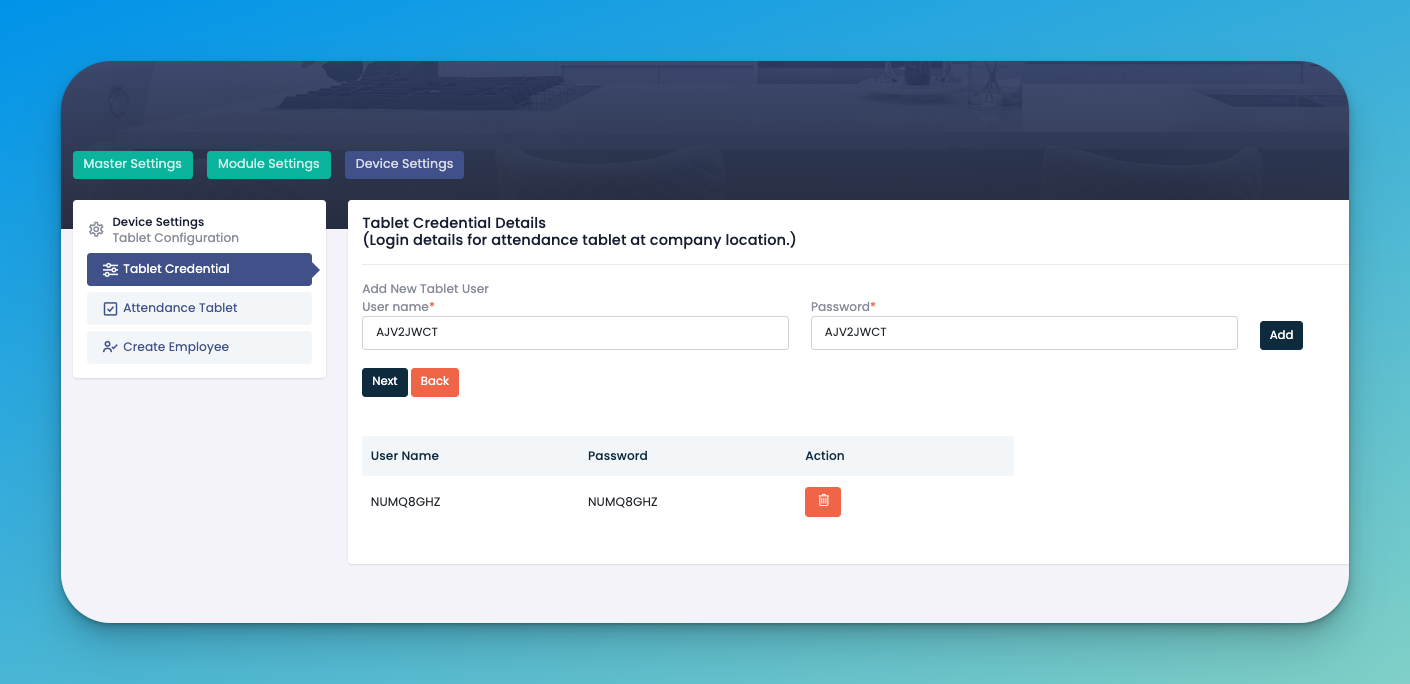
Create Tablet Credentials
Tap the + icon next to Tablet Credentials
Username: Enter a simple login (e.g., tablet01)
Password: Choose a secure default (staff can’t change this)
Tap Add to save
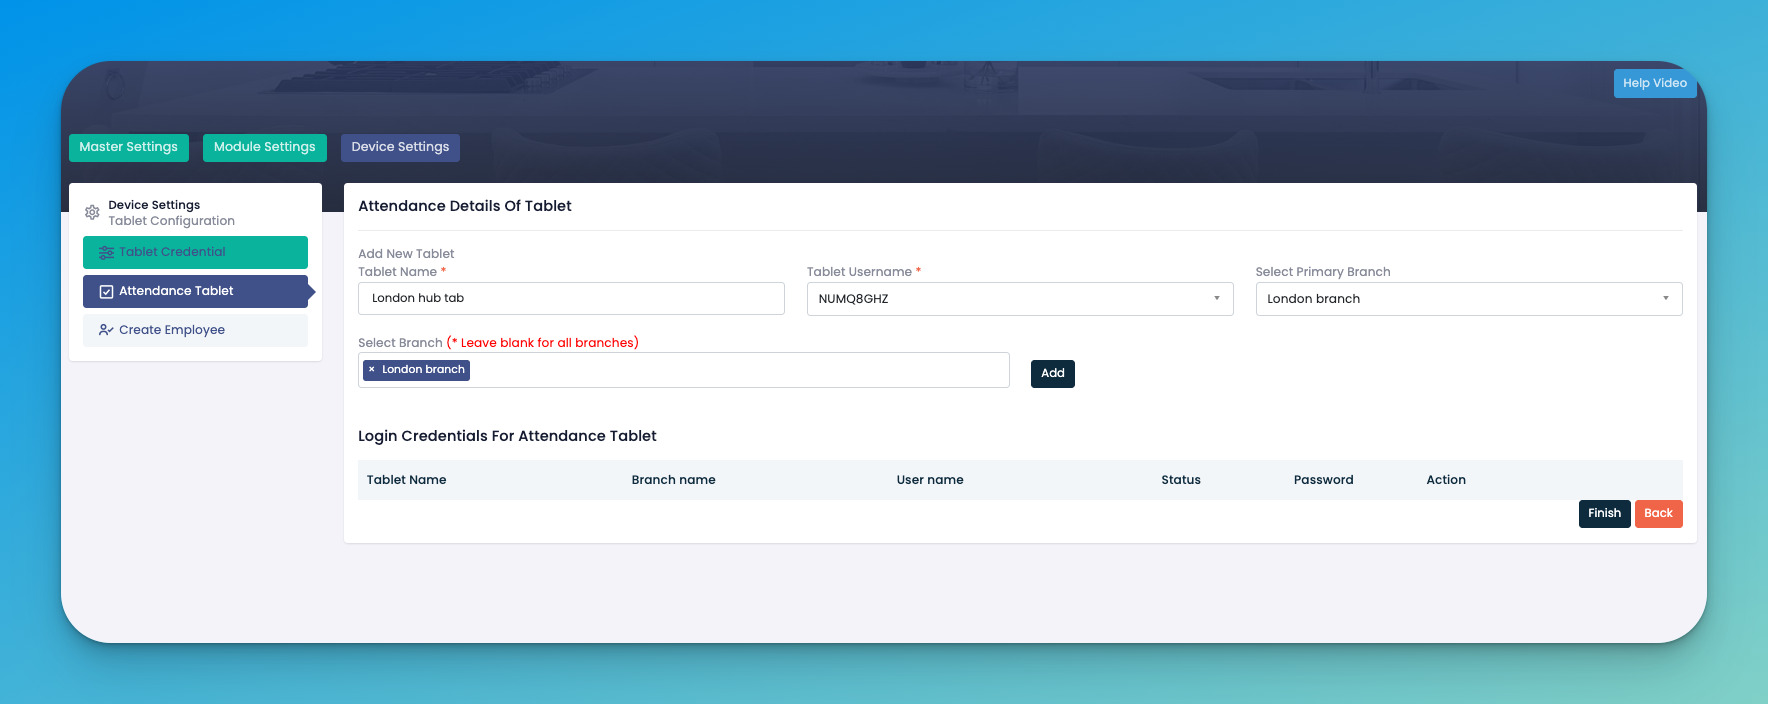
Assign Tablet to Branch
In the Tablet List, find your new tablet
Tap Assign (🚩 flag icon)
Branch: Select one branch—or leave blank to assign to all
Send Credentials: Tap Email to send login details, or copy for manual distribution
Tap Finish
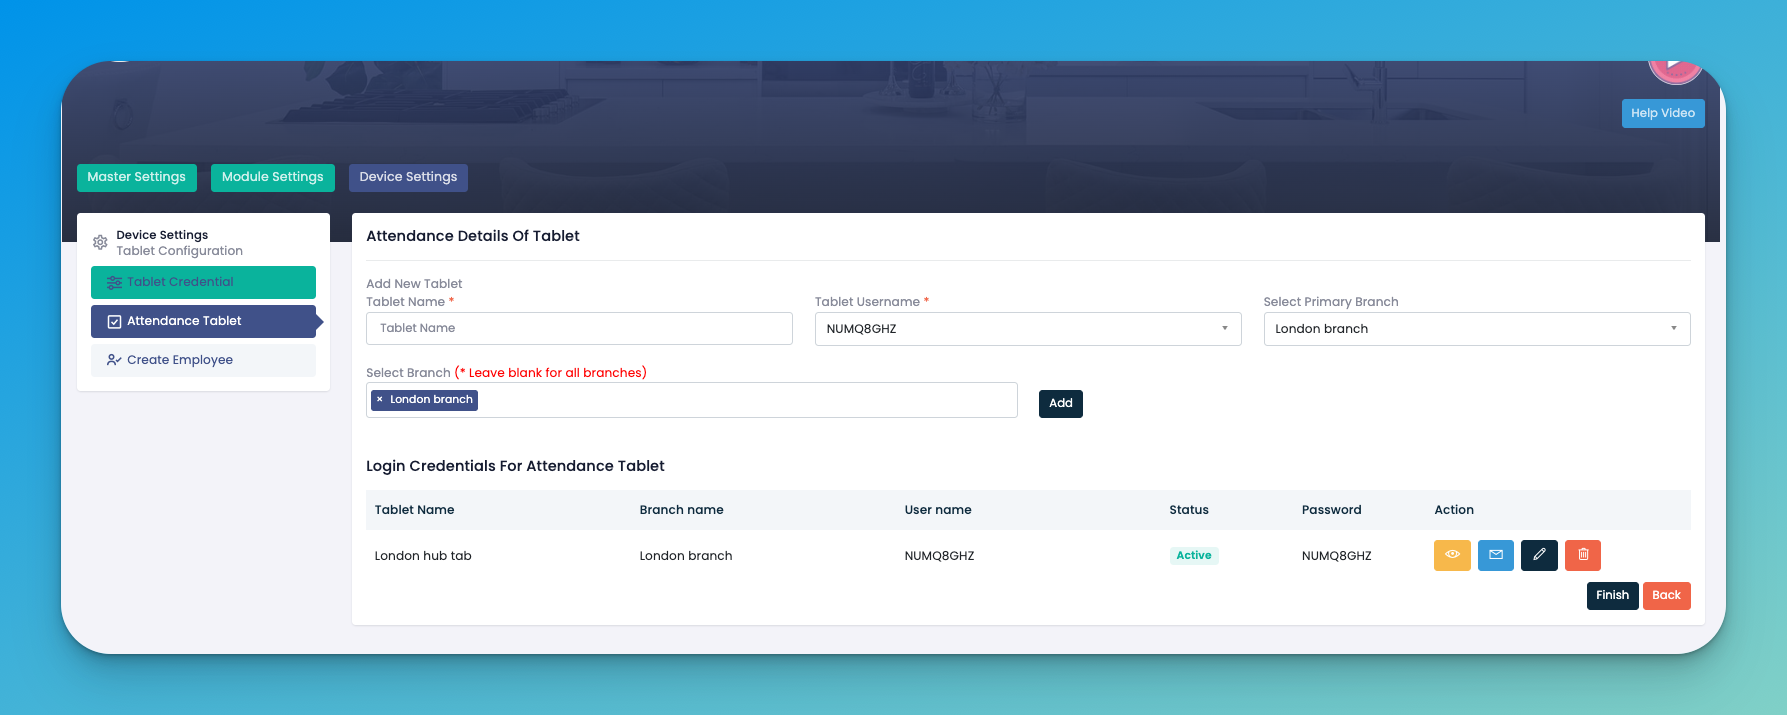
Verify Tablet Registration
On the tablet device, open the eHubt Attendance App
Log in with the credentials you just created
Confirm the home screen shows your assigned branch and your name
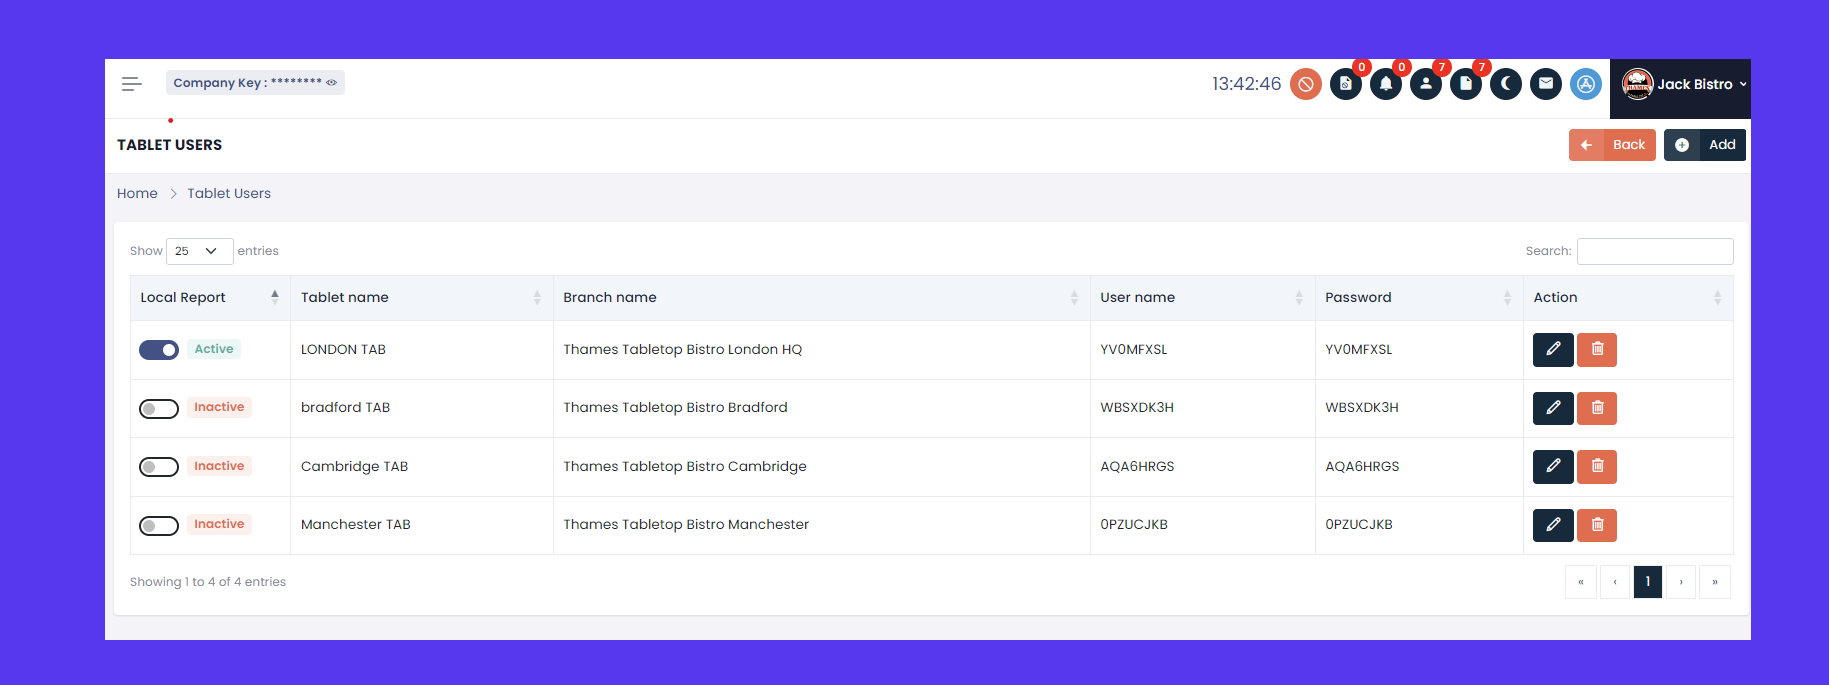
Tablet List: All configured devices, with columns for Username, Branch, and Status
Assigned Branch: Shows where each tablet is active
Actions:
✏️ Edit credentials
🗑️ Delete a tablet
📤 Resend credentials
Unique Credentials: Use a separate username/password per tablet for audit clarity
Global Tablets: Leaving branch blank allows a tablet to serve any location
Test Immediately: Always log in on the tablet right after setup to catch issues early
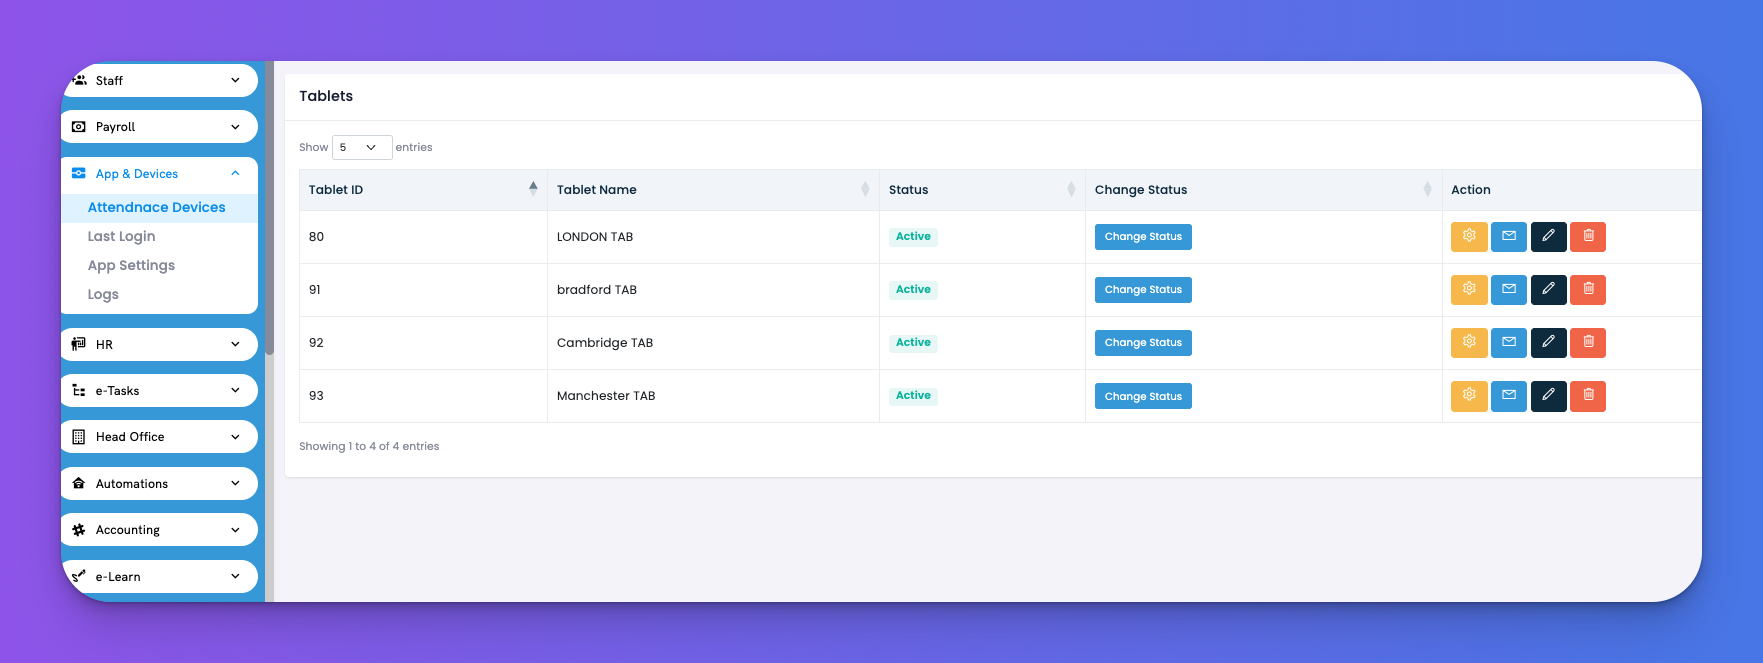
Navigate to App & Devices → Attendance Devices
Each tablet appears on its own line with:
🆔 Tablet ID
📛 Tablet Name
🔘 Status (Active / Inactive)
🔄 Change Status (toggles Active/Inactive)
⚙️ Settings • ✉️ Send Credentials • ✏️ Edit • 🗑️ Delete
Click the 🔄 Change Status button next to any tablet to activate or deactivate it
Click the ⚙️ Settings icon
Edit fields:
Tablet Name / Model No
Assigned Tablet User
Primary Branch
Allowed Check‑in Radius (meters)
On‑screen Instructions (Content)
Click Update to save
Click the ✉️ Send Credentials icon to email that tablet’s username & password to its assigned user
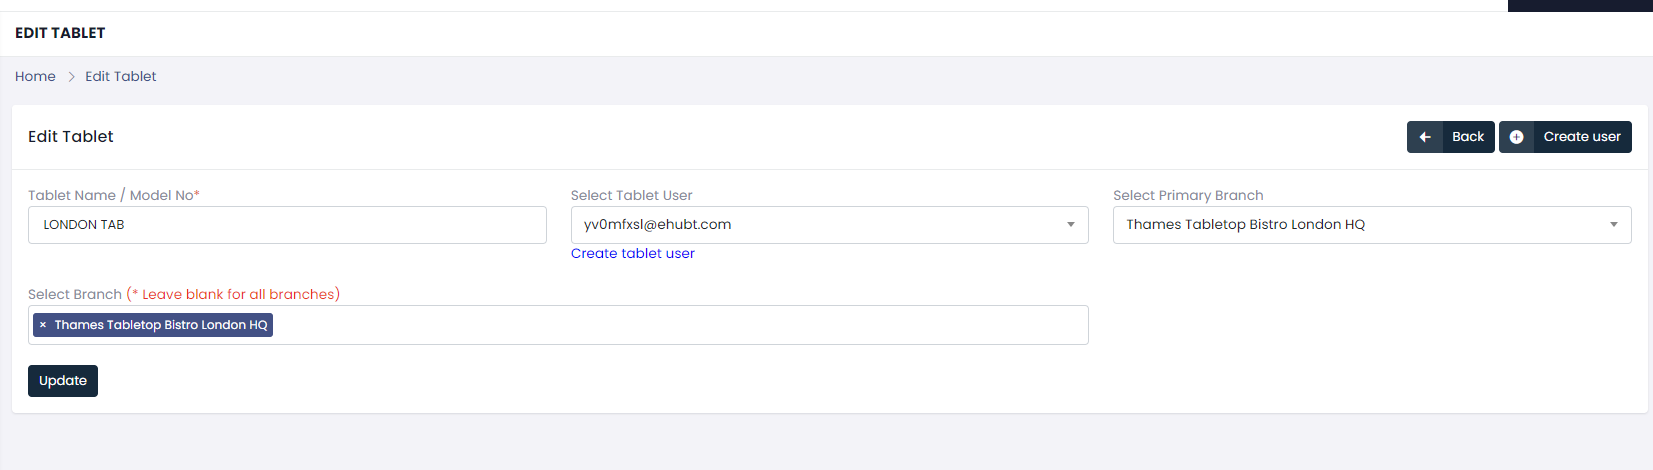
Click the ✏️ Edit icon
Modify:
Tablet Name / Model No
Assigned Tablet User
Branch Access
Click Update to apply changes
Click the 🗑️ Delete icon to permanently remove a tablet
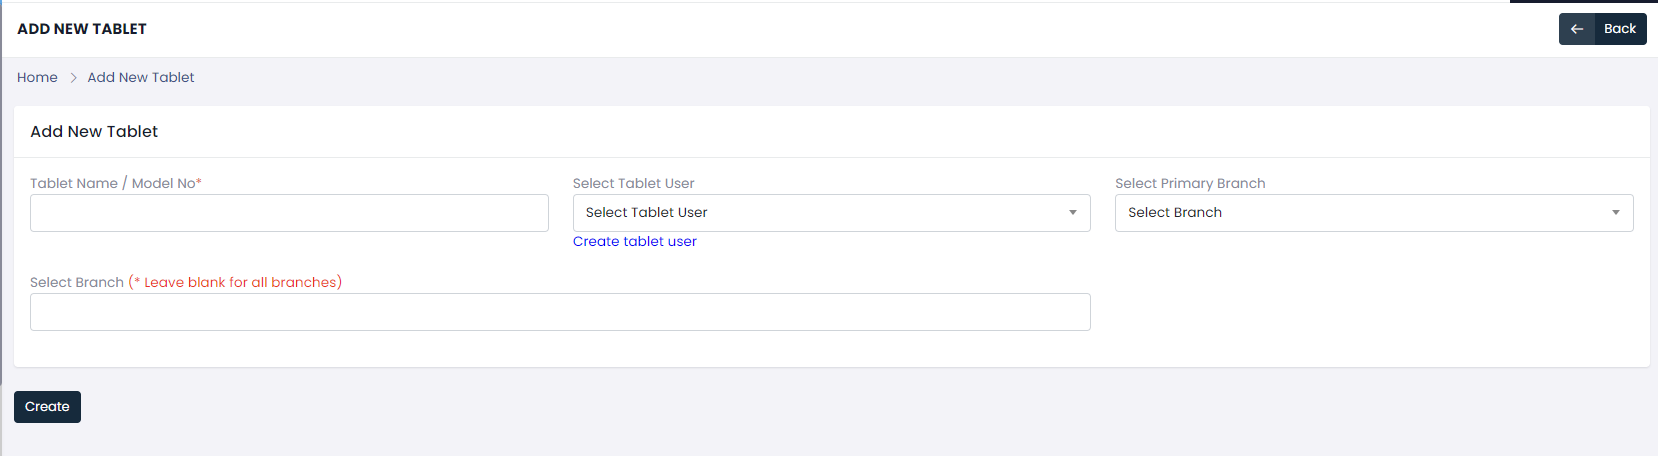
Click Add at the top of the Attendance Devices page
Enter:
📛 Tablet Name / Model No
👤 Select or create a Tablet User
🏢 Primary Branch (required)
🗺️ Additional Branches (optional)
📏 Allowed Check‑in Radius (meters)
Click Create
Your new tablet appears immediately in the list
💡 Pro Tip: Once tablets are created here, you can manage everything—status, credentials, settings—without ever revisiting Company Settings.
Once your tablet credentials are set up, let’s log in on the eHubt Attendance App:
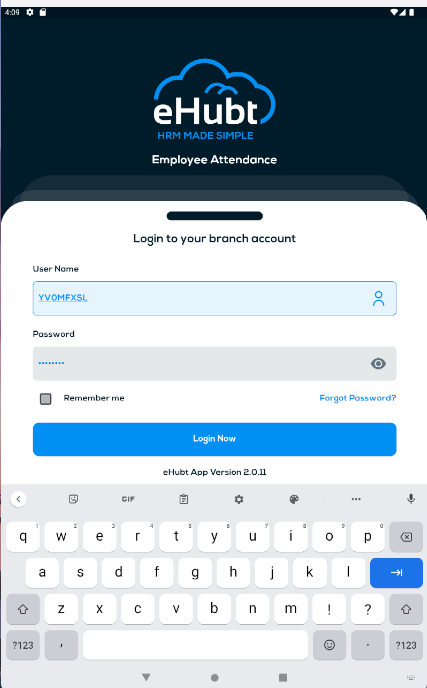
Open the eHubt Attendance App on your tablet device.
Enter Your Tablet Username
Use the same username you created (e.g., LONDON TAB or tablet01).
Enter Your Tablet Password
The default password you assigned when creating credentials.
Tap Login Now
You’ll be taken to the branch home screen.
Verify Your Branch & Tablet Name
Top banner should display your assigned branch (e.g., “Thames Tabletop Bistro London HQ”)
Your tablet’s name appears under the logo (e.g., “LONDON TAB”).
✅ What You’ll See
Branch Account: Confirms you’re clocking into the correct location
Tablet Identifier: Matches the name you assigned in Company Settings
Clock In / Clock Out Buttons: Ready for staff to tap when they arrive or leave
Once logged in, staff can record their attendance directly on the tablet:
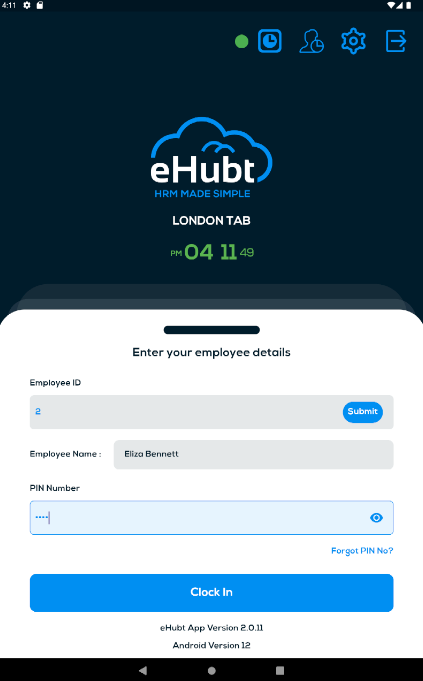
Enter Employee ID
Tap the Employee ID field.
Key in the ID number (e.g., 2) and tap Submit.
Confirm Your Name
Your name appears below (e.g., Eliza Bennett).
Enter PIN
Tap the PIN Number field, enter your personal code, then tap Clock In.
Clock Out, Break In & Break Out
When your shift ends, tap Clock Out.
To start a break, tap Break In; to end it, tap Break Out.
If you need to log off (e.g., at day’s end), tap the Logout icon in the top bar.
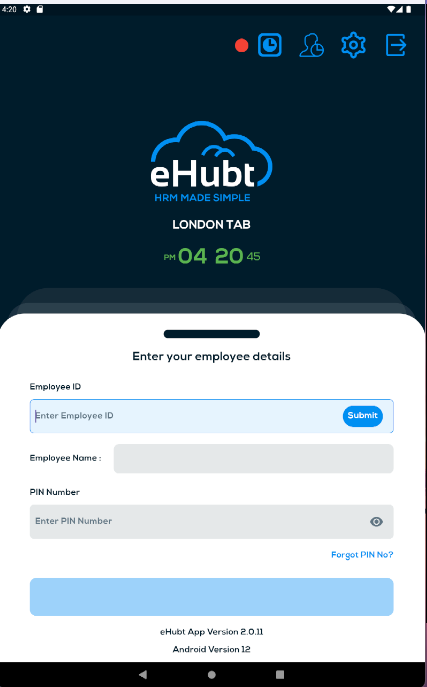
Green Dot 🟢 – Tablet is online; punches sync in real time.
Red Dot 🔴 – Tablet is offline; data stored locally and auto‑syncs once reconnected.
Clock Icon ⏰ – Your current status: clocked in, on break, or clocked out.
User Icon 👤 – Switch user or view current employee.
Settings ⚙️ – Access tablet options (e.g., change PIN, log out).
💡 Pro Tips:
Offline Mode: You can still clock in/out and take breaks even without Wi‑Fi; data will update when the connection returns.
Forgot PIN? Tap Forgot PIN? to request a reset via email.
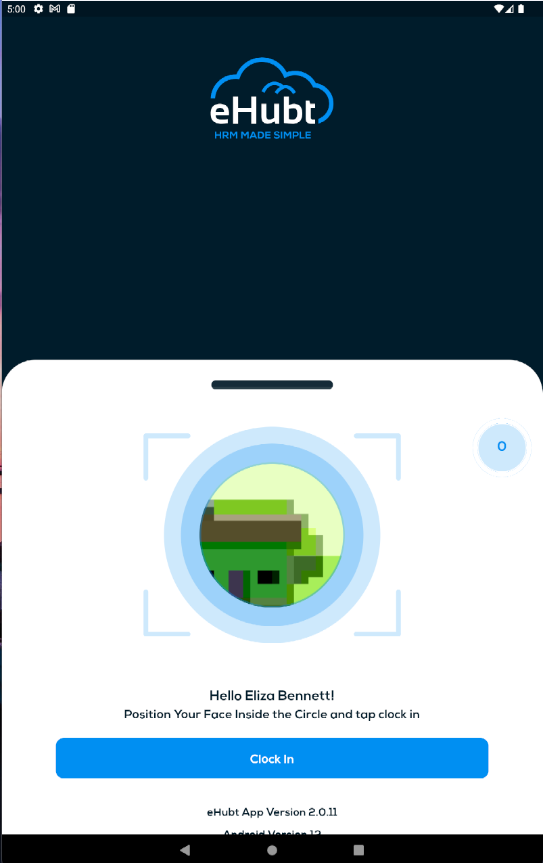
If enabled, the app will prompt for a face scan before clock‑in/out:
Position the employee’s face inside the circle.
Tap Clock In when the scan completes.
Unique Credentials: Create one user per tablet for clear audit trails.
Global Tablets: Leave the branch field blank to allow a tablet to serve all locations.
Test Immediately: Always log in and clock in/out right after setup to verify correct configuration.
Allowed Check‑In Radius: Configure how far (in meters) the tablet will accept punches from GPS‑tracked devices in Settings ⚙️.
❓ Need Help?
Visit our Help Center at desk.ehubt.io or contact your eHubt support representative.